Magic Ring Crochet Tutorial: Step by Step Guide
Master the magic ring crochet technique with our comprehensive step-by-step guide, perfect for creating tight, clean starts in your projects.
WeLovePattern Editorial Team
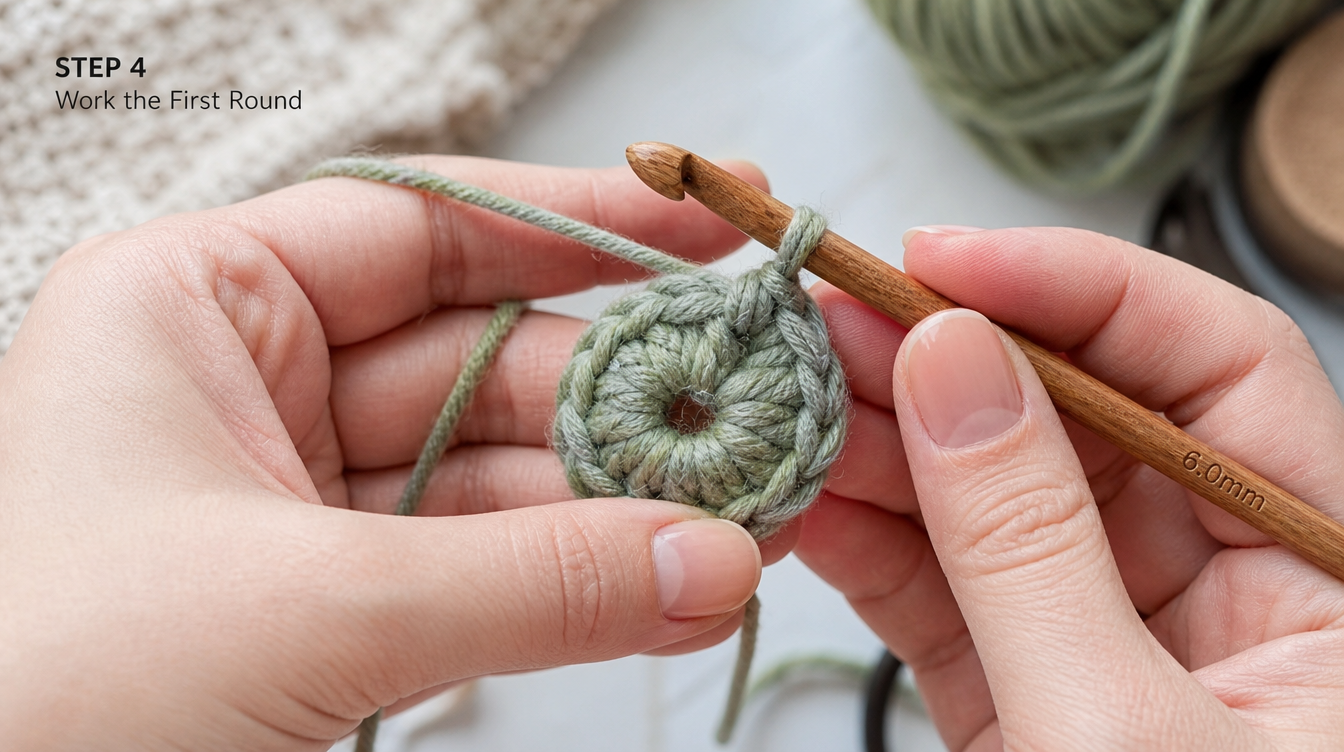
Introduction to the Magic Ring Technique
The magic ring, also known as the magic circle, is an essential technique for any crochet enthusiast looking to create seamless, tightly closed centers in their circular projects. This method is particularly beneficial for projects like amigurumi, hats, and other items that require a neat and professional finish. While it may seem tricky initially, with practice, the magic ring becomes an invaluable skill in your crochet arsenal. This guide will walk you through the process step by step, ensuring that even beginners can master this technique with ease.
Materials Needed
Before diving into the magic ring technique, gather the following materials:
- Yarn: Choose either a CYC #4 Medium / Worsted or CYC #3 Light / DK yarn. These weights are ideal for most small projects that require a magic ring. Cotton yarns offer less stretch and are excellent for structure, while acrylic provides more elasticity and is typically easier to handle for beginners.
- Crochet Hook: A 5.0 mm (H-8) or 4.0 mm (G-6) hook works well with the recommended yarn weights. Select a hook size that feels comfortable in your hand and suits your tension style.
- Scissors: For cutting yarn.
- Tapestry Needle: Useful for weaving in ends and securing the magic ring. It ensures that the work stays intact and professional.
Step-by-Step Magic Ring Tutorial
Step 1: Creating the Loop
- Hold the yarn tail in your palm with your non-dominant hand. This provides stability as you create the initial loop.
- Wrap the yarn around two fingers, forming an 'X' at the front. This cross will help you anchor the loop as you proceed.
- Insert the hook under the first strand and over the second strand of the 'X'. This setup is crucial for forming the base of your magic ring.
Step 2: Forming the Ring
- Pull the second strand under the first, creating a loop on the hook. Ensure the loop is secure but not too tight, as it needs to be adjustable later.
- Twist the hook to secure the loop, then yarn over and pull through to create a slip knot on the hook. This slip knot acts as the anchor for your magic ring.
Step 3: Adding Stitches to the Ring
- Yarn over and pull through the loop to form the first chain. This chain doesn't count as a stitch; it secures the ring.
- Crochet the desired number of stitches into the ring. For example, if starting an amigurumi project, you might begin with six single crochets. Ensure that the stitches are evenly spaced around the ring for a uniform start.
Step 4: Closing the Ring
- Hold the stitches, then pull the yarn tail to close the ring tightly. The tighter the pull, the smaller the hole in the center.
- Join with a slip stitch to the first stitch if working in rounds. This completes the circle and prepares you for the next round of stitches.
Common Challenges and Solutions
Maintaining Tension
It can be challenging to maintain even tension while forming the ring. Ensure your grip is firm but not too tight, and practice the motion until it feels natural. If your tension is too tight, the ring may not close properly, and if too loose, the stitches may look uneven.
Securing the Ring
The magic ring may loosen if not secured properly. After completing the first round, pull the tail tightly and weave it securely into the beginning stitches using a tapestry needle. This prevents unraveling. For additional security, consider making a knot with the tail after weaving it through a few stitches.
Hook Placement Confusion
Beginners often struggle with where to insert the hook. Focus on consistent practice, and remember that the loop on your hook is the starting point for your stitches. Ensure the hook is placed correctly under the yarn to avoid accidental splitting.
Understanding Yarn and Hook Choices
Choosing the right yarn and hook is crucial for executing the magic ring effectively. Wool yarns provide warmth and elasticity, making them ideal for winter hats and cozy items. Cotton yarns, being stiffer, offer defined stitches, perfect for intricate designs. Acrylic yarns are versatile, cost-effective, and easy to care for, suiting most beginners' projects. The hook size should complement the yarn; a larger hook with a thinner yarn can result in loose, airy stitches, while a smaller hook with a thicker yarn can produce tight, compact stitches.
Finishing Touches: Blocking
Blocking is an essential finishing step that improves the look of your crochet projects. For a magic ring, blocking helps set the stitches and smooth out any minor unevenness. Wet blocking involves soaking the finished piece in lukewarm water, then laying it flat to dry, gently shaping it as needed. Steam blocking involves using a steam iron to lightly press the project, carefully avoiding direct contact with the fabric to prevent damage. Both methods enhance the overall appearance of your work, giving a polished finish.
Practical Troubleshooting
If you're facing issues with uneven tension or curling borders, consider adjusting your stitch tension or experimenting with different yarns. Curling often occurs when stitches are too tight; try loosening your grip or using a slightly larger hook. For borders that curl, adding a few extra stitches or using blocking techniques can help flatten the edges.
Variations and Applications
The magic ring is versatile and can be adapted for various projects:
- Amigurumi: Essential for creating tight, seamless starts in stuffed toys. Amigurumi often requires a very tight center to prevent stuffing from showing through.
- Hats: Provides a neat crown, ensuring no hole at the center. This method allows for a professional finish that makes your handmade hats look store-bought.
- Coasters and Home Decor: Achieves a polished look in circular motifs, adding elegance to your home items.
Frequently Asked Questions
How do I secure the magic ring so it doesn't unravel?
To prevent the magic ring from unraveling, pull the tail tightly after completing the first round and weave it securely into the beginning stitches.
Can I use any type of yarn to make a magic ring?
Yes, the magic ring can be made with any yarn type, but it is particularly common with CYC #4 Medium / Worsted and CYC #3 Light / DK for smaller projects.
Is the magic ring necessary for all circular crochet projects?
While not strictly necessary, the magic ring is preferred for projects needing a tight, closed center as it provides a cleaner and more professional finish compared to traditional chains.
Conclusion
Mastering the magic ring technique opens up a world of possibilities in your crochet projects, allowing for clean, professional finishes. With patience and practice, you'll find this method becomes second nature, enhancing the overall appearance of your circular creations. Whether you're making amigurumi, hats, or decorative home pieces, the magic ring is a fundamental skill that elevates the quality of your work. Happy crocheting!